
Roll Your Own VPN
Complete Wireguard Homelab Guide

🛡️ Spin Up Your Own Personal VPN with WireGuard on DigitalOcean
A dead-simple guide to building your own private tunnel in under 30 minutes.
If you want control over your own traffic, bypass throttling, or secure public Wi-Fi without trusting a third-party VPN, this guide is for you.
We’ll walk through deploying a WireGuard VPN on a $5 DigitalOcean droplet, step-by-step.
🔐 Why Every Cyber Student Should Build Their Own VPN
If you’re in cybersecurity and you’ve never deployed your own VPN… you’re playing defense without ever strapping on the helmet.
At BowTiedCyber, we don’t just study protocols—we build them.
Our students don’t passively memorize content—they deploy real-world systems, from firewalls to SIEMs to VPNs like this one.
This guide walks you through setting up a WireGuard VPN on a $5 DigitalOcean droplet, step-by-step. It’s simple, fast, and battle-tested.
If this type of hands-on learning lights you up, the Zero to Hoodie Cybersecurity Bootcamp is built exactly for you.
No fluff. No filler. Just 90 days of guided execution—certs, skills, strategy—until you’re hire-ready and dangerous.
Now let’s get your VPN live.
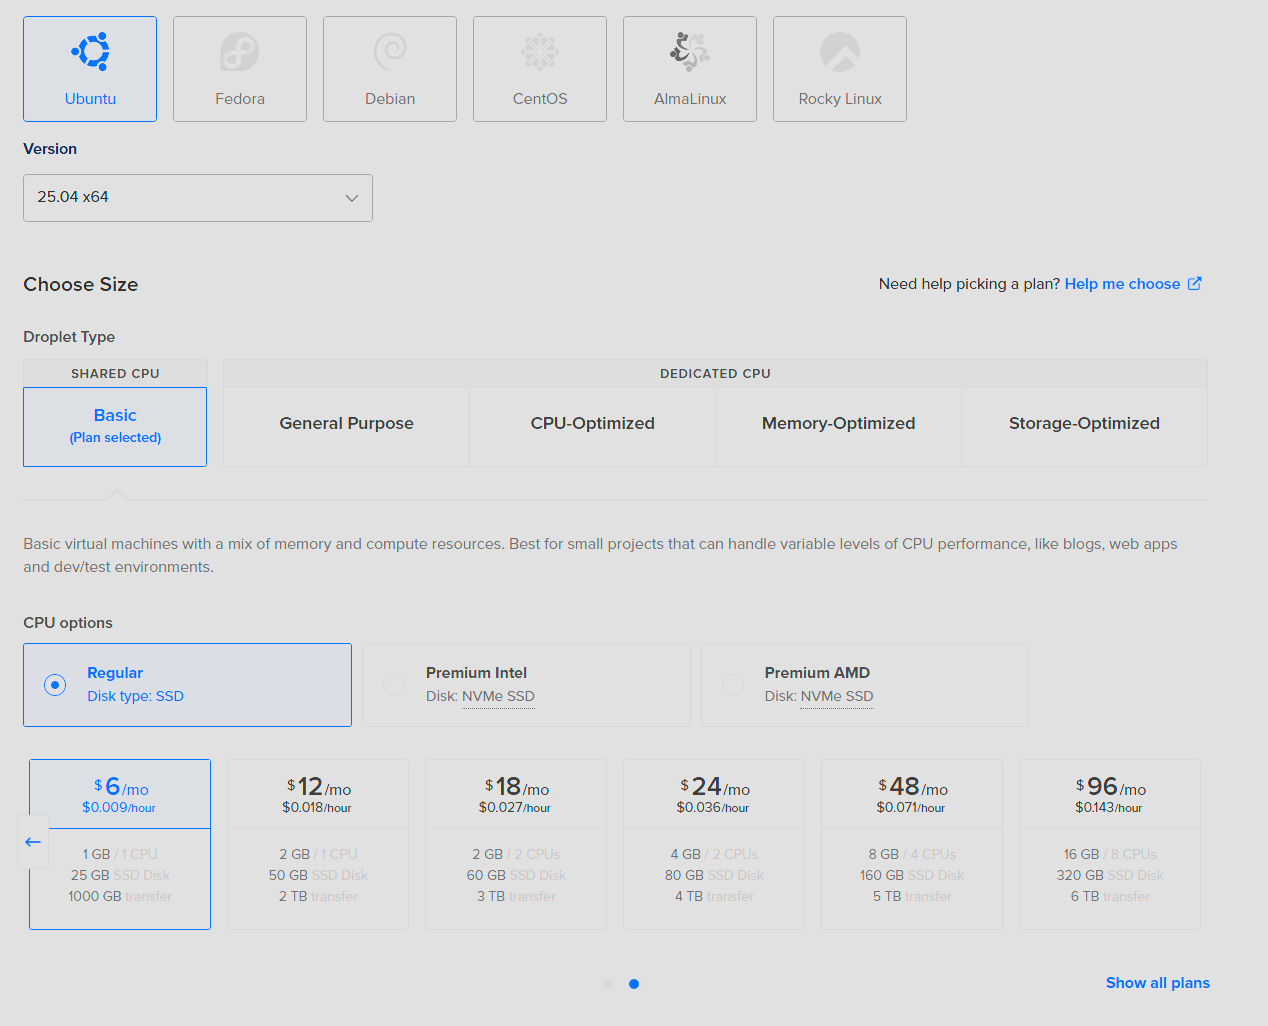
✅ Step 1: Create the Droplet
Log into DigitalOcean.
Create a droplet with the following:
Ubuntu 22.04 LTS
$6/month plan (1 vCPU / 1GB RAM)
Closest region to you
Add your SSH key (recommended) or strong root password
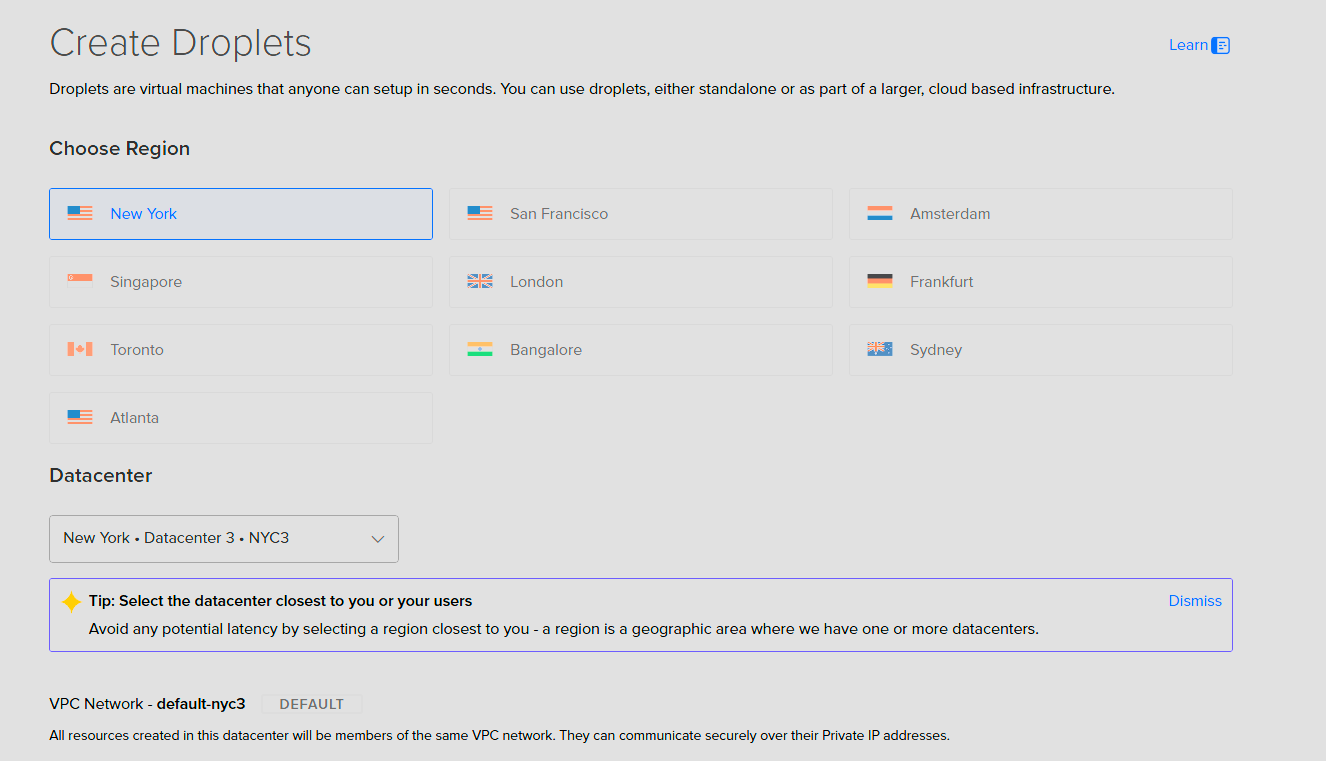

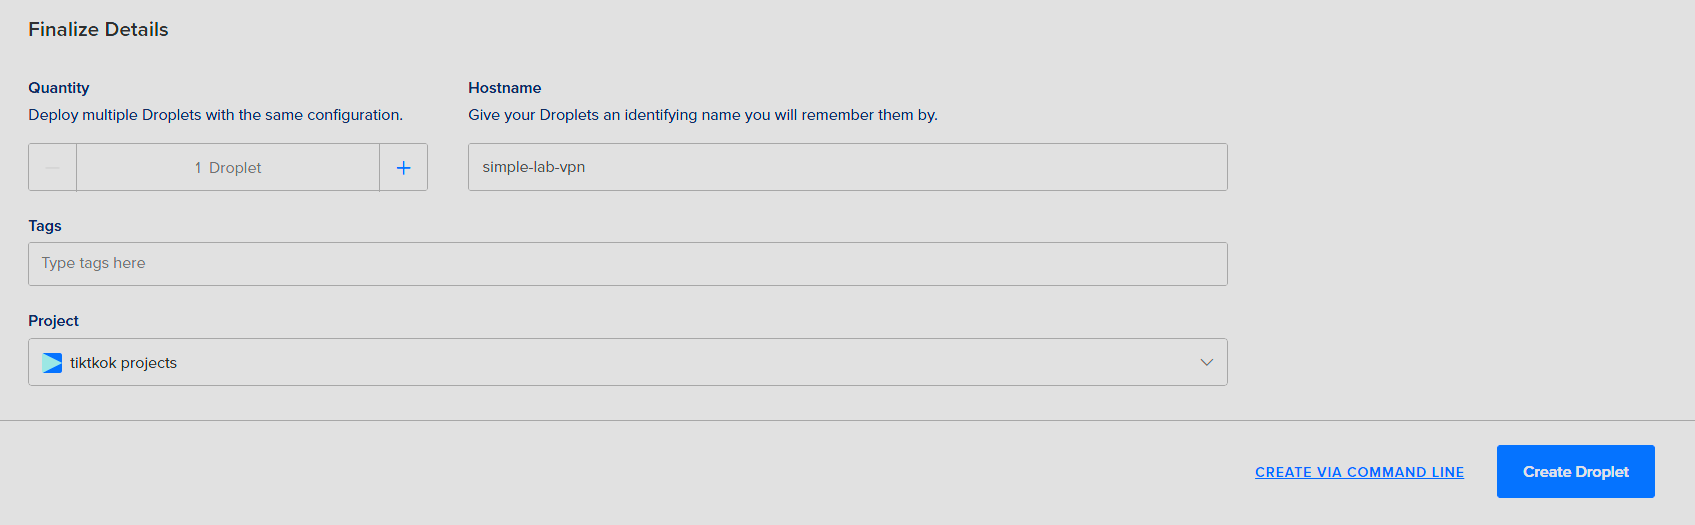
Save the public IP address of your new droplet.


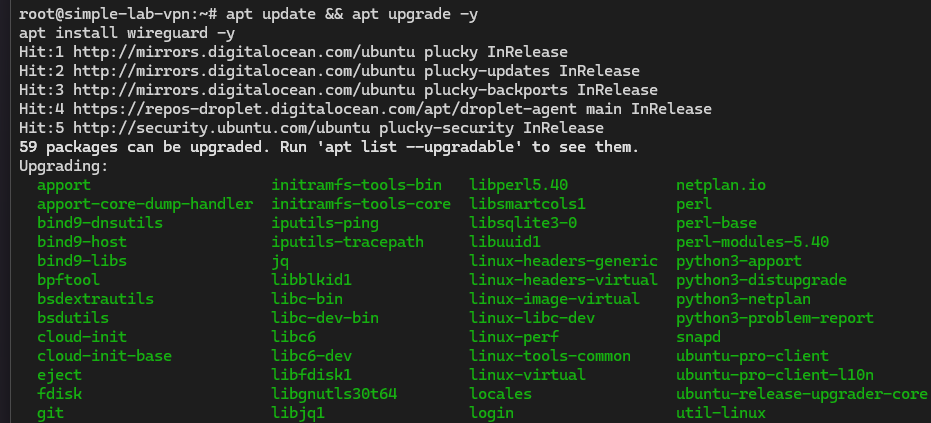
🔌 Step 2: Connect & Install WireGuard
SSH into your new droplet:
ssh root@your_droplet_ip

Update and install WireGuard:
apt update && apt upgrade -y
apt install wireguard -y
🔑 Step 3: Generate Keys
Navigate to the config directory:
cd /etc/wireguard
Generate server keys: